
2 posts tagged with "biosensei"

View All Tags

Access Control from Your Phone

Β· 3 min read
BioSensei Team
Engineering & Product

ZKTeco devices are the undisputed kings of security hardware. Facial recognition, fingerprints, cards, passwords, and even palm reading... they do it all. It's a perfect solution when we're talking about controlling the same 40 people who go to the office every day.

But let's be honest: the world moves faster than a static database. What happens with visitors, suppliers, or that important client you don't want waiting at the reception?

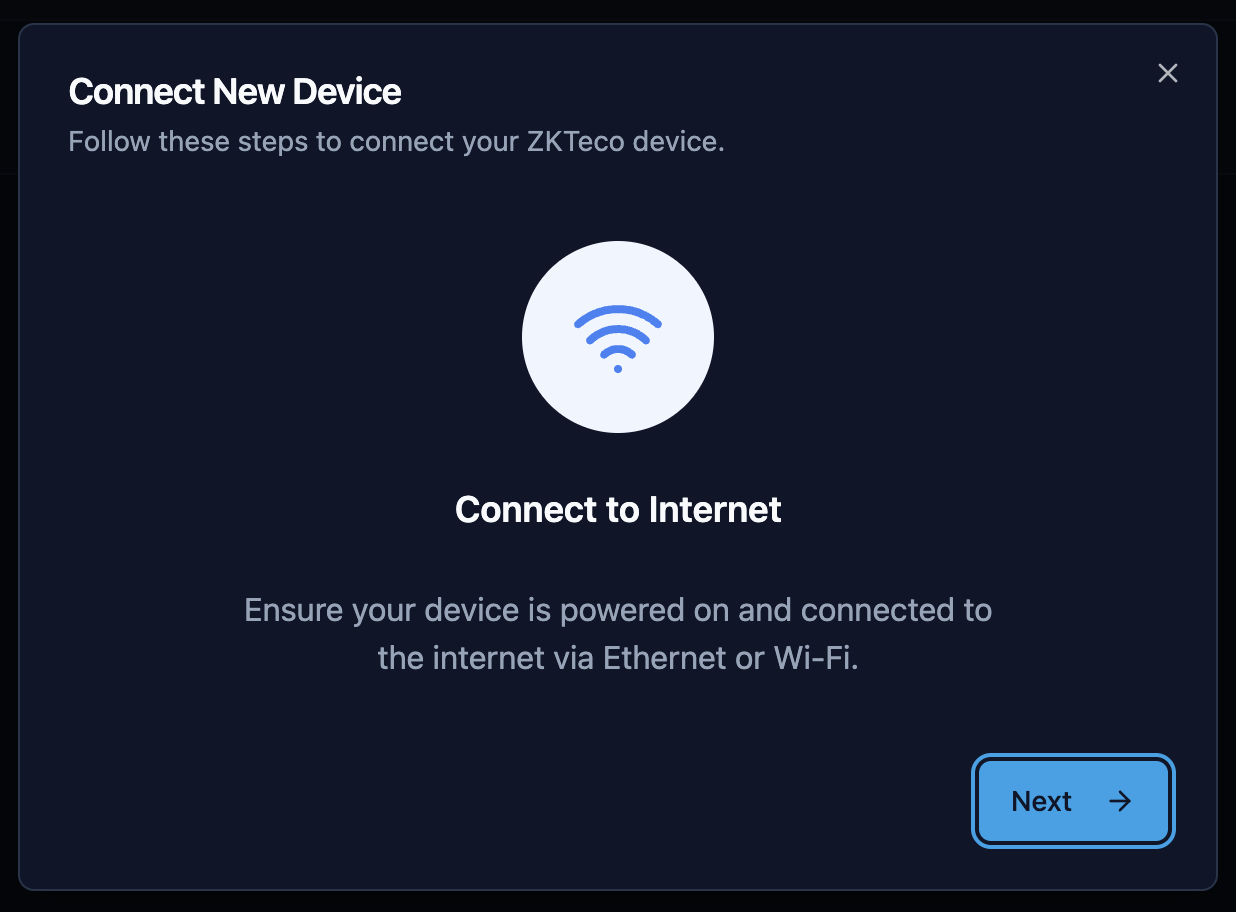
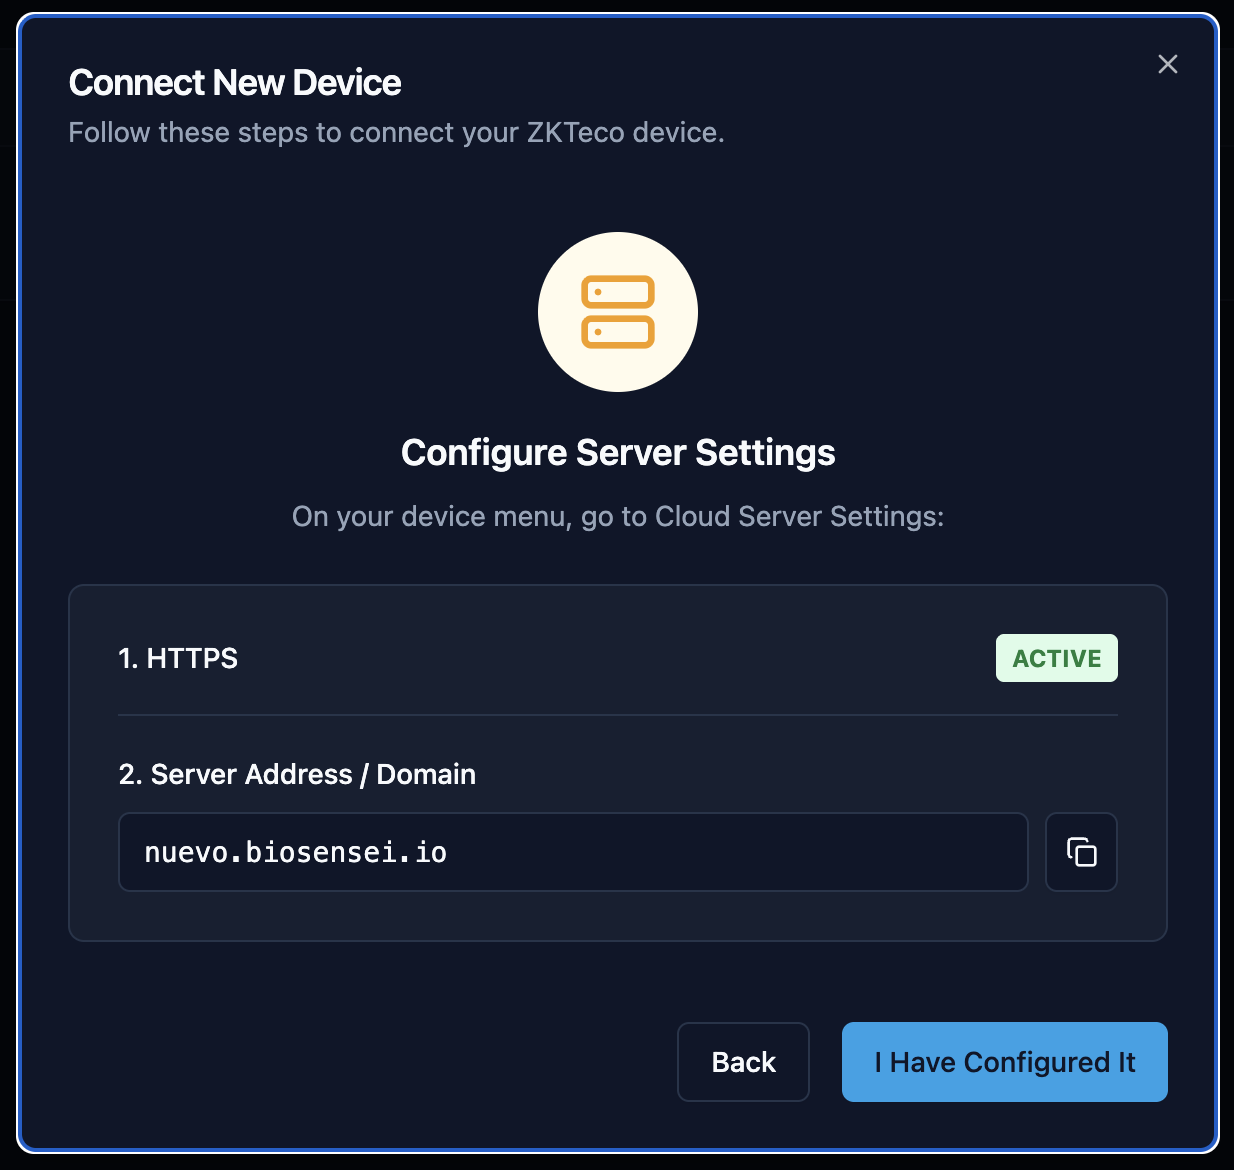
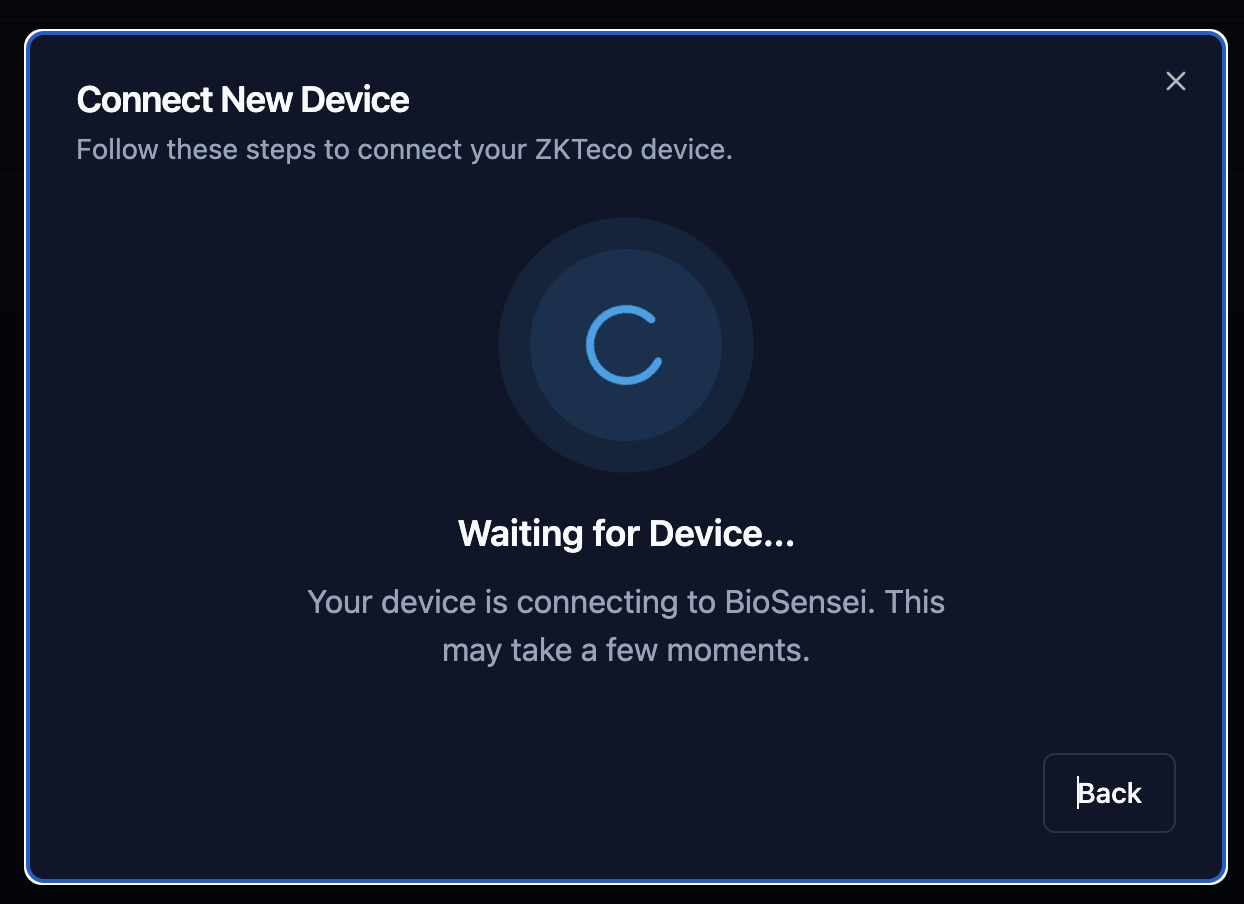
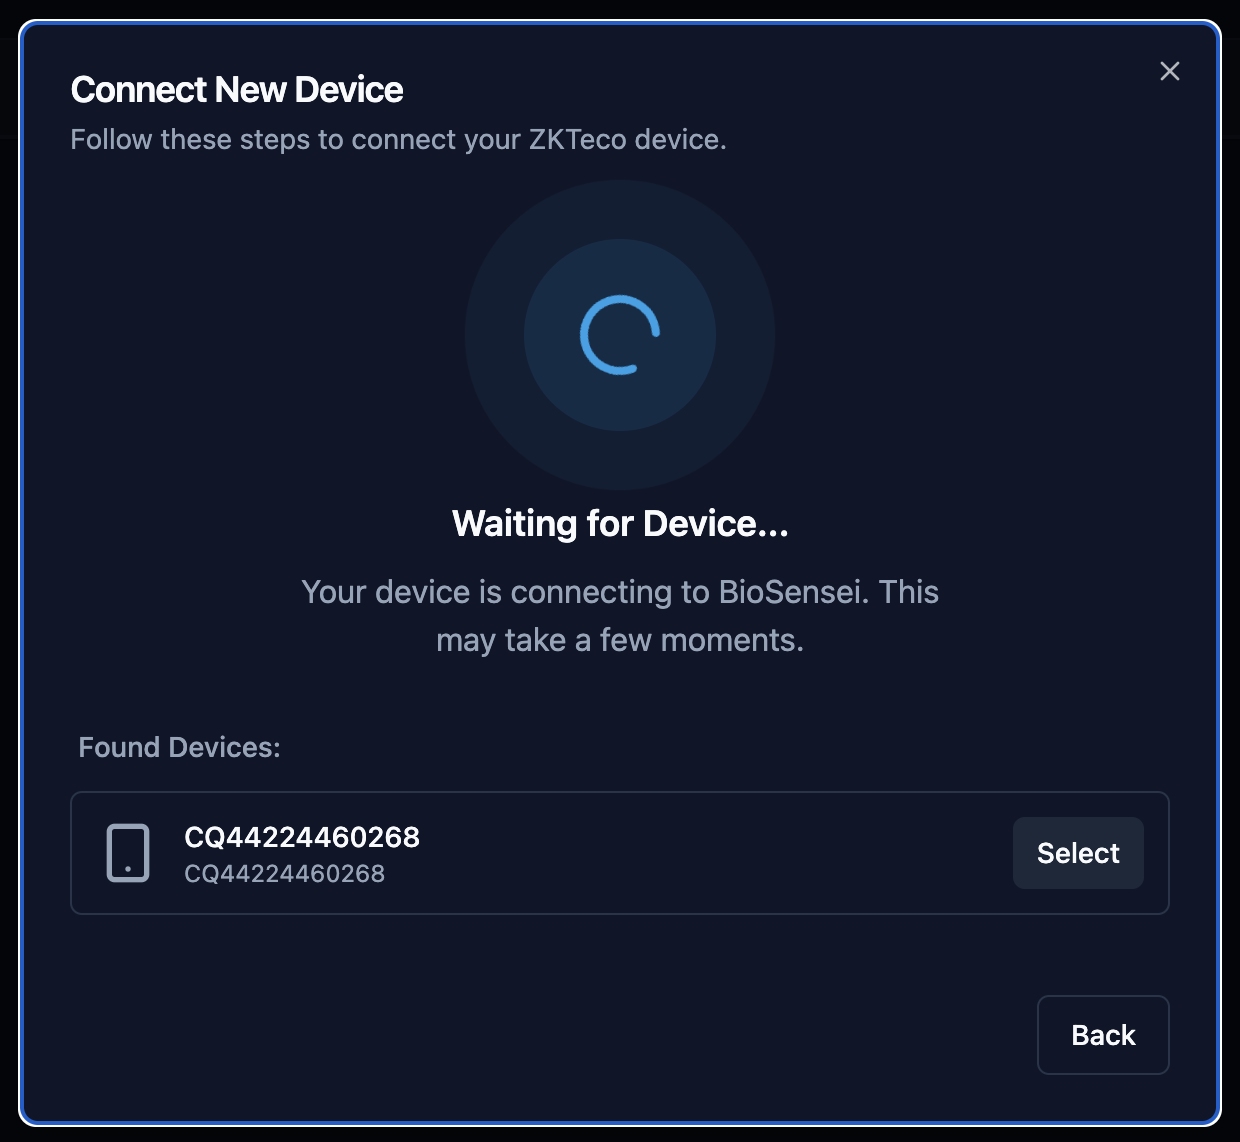
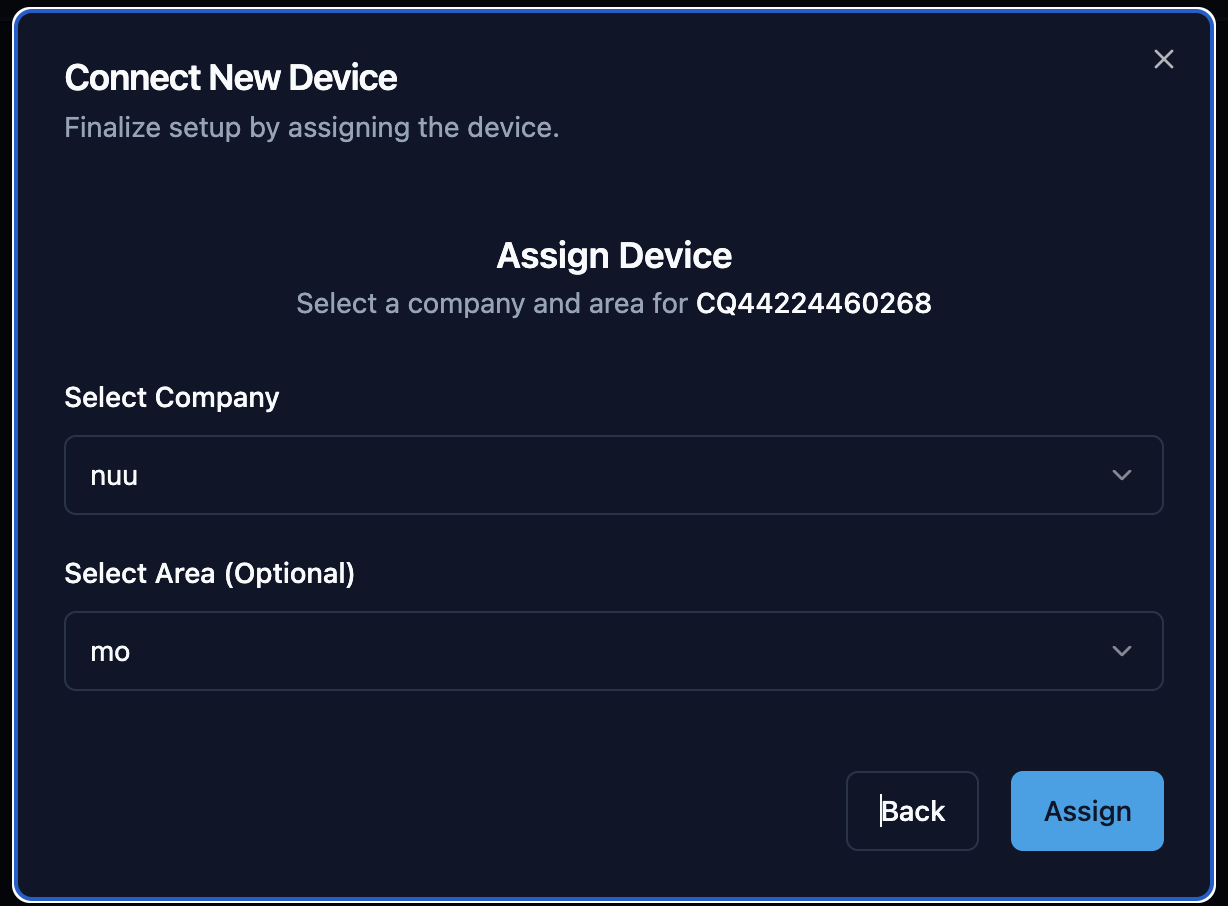
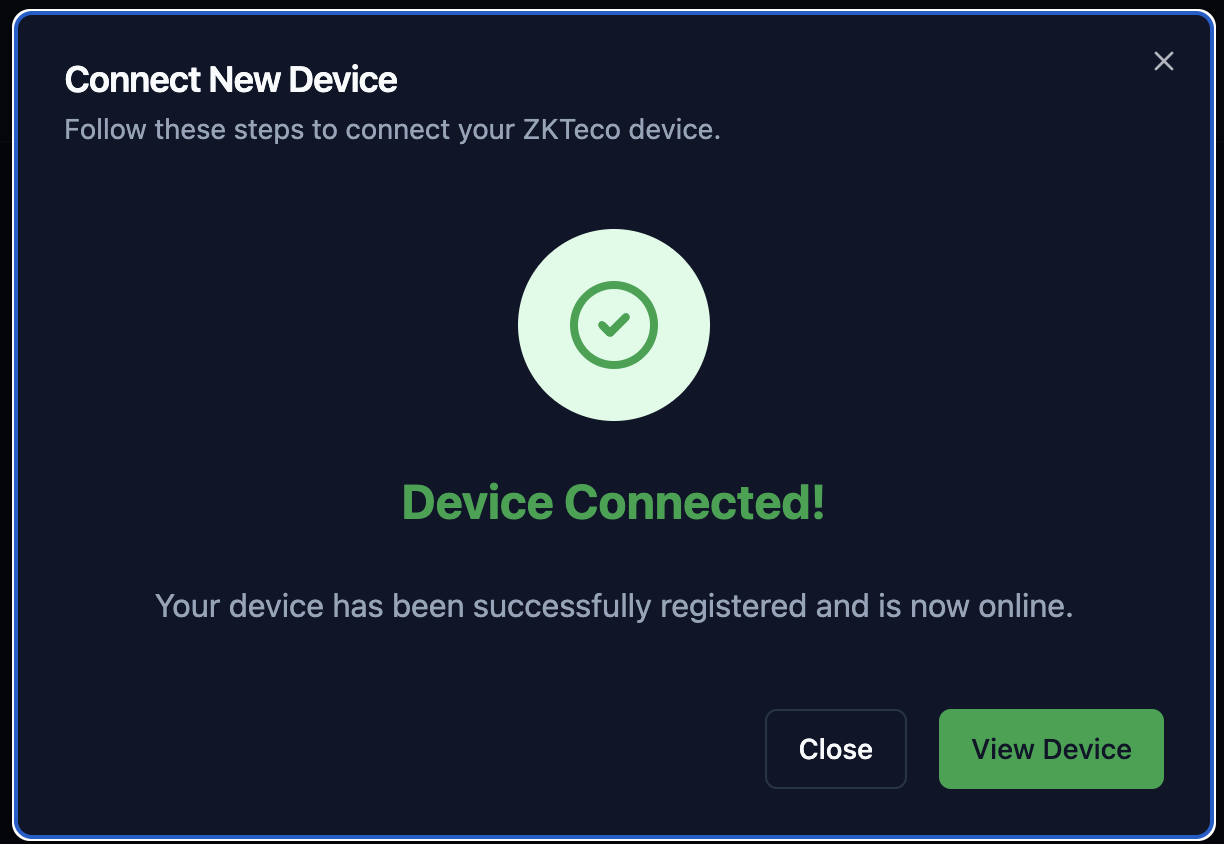
This is where Biosensei comes in. We don't just manage your hardware; we are upgrading your ZKTeco devices to the 21st century by connecting them directly to your users' smartphones.


πŸš€ Your Office in a Click​

Imagine arriving at the office and, before getting out of your car or while walking down the hallway, you simply open the Biosensei App, select the door, and... Voila! The door opens instantly for you. No contact, no lost cards, and no slow processes. You only need to register once, and your authorized accesses will always be ready.

Mobile Doors

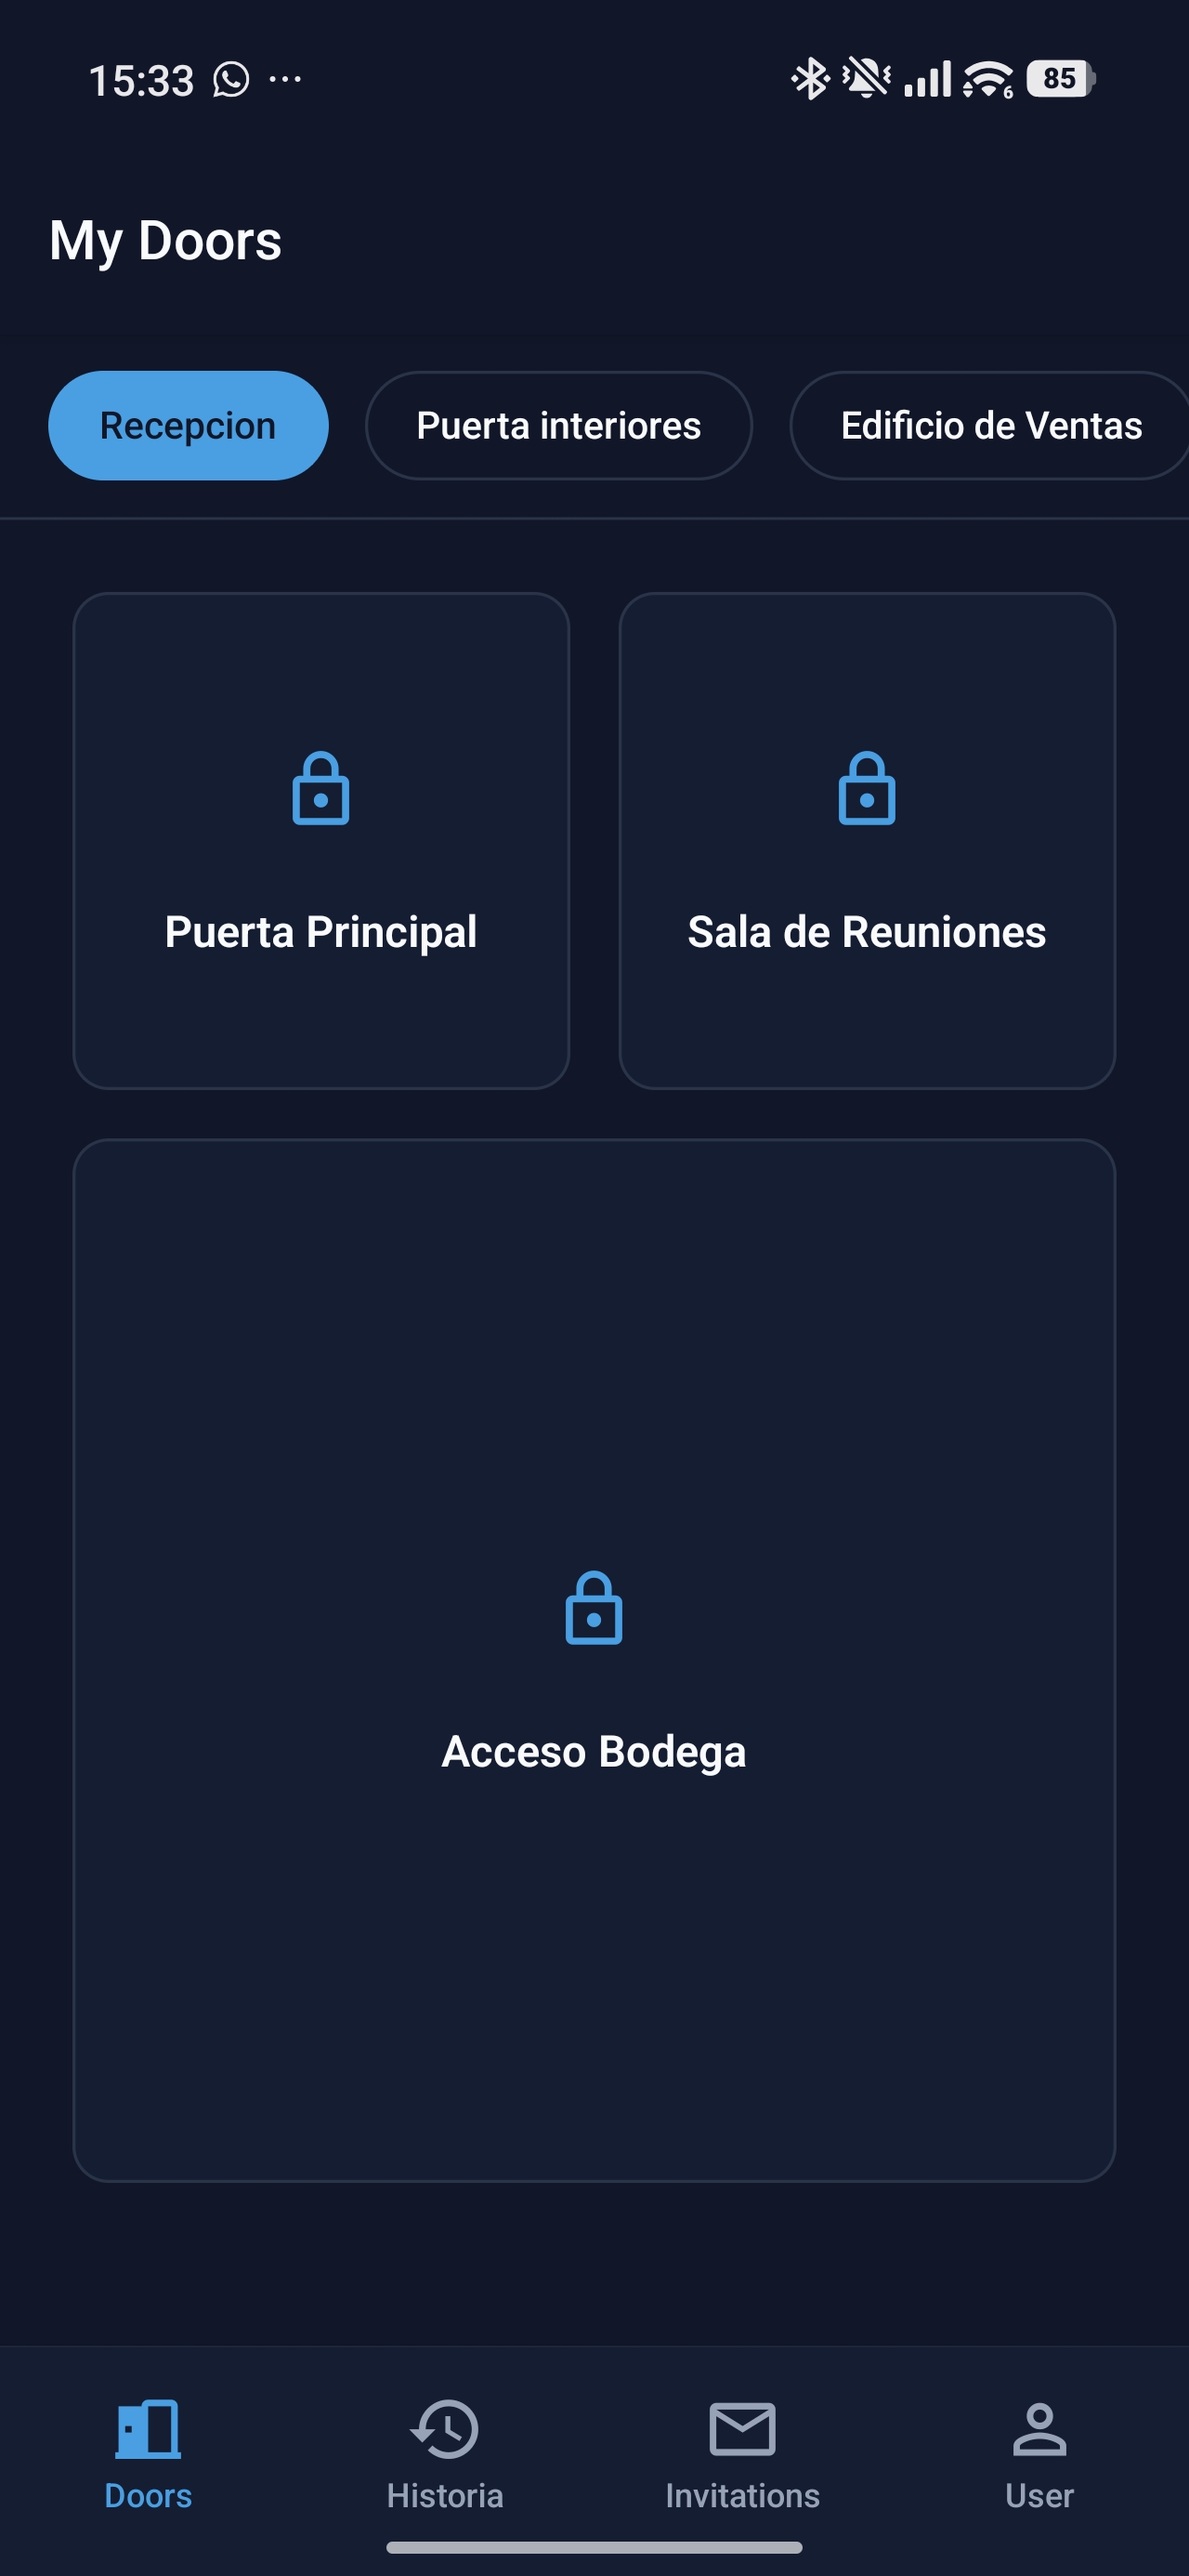
In the "My Doors" interface, you have total control of every access in your company right in the palm of your hand.


🀝 Guests Opening My Doors? Yes, but Under YOUR Control​

You're probably wondering: How am I going to let a guest open the door without me being there? The answer is simple: hospitality and efficiency.

Think about it. If you have a vehicle barrier at the entrance, you don't want to hold up a valuable client under the sun, wasting minutes on manual logs. In a 60-minute meeting, it's common to lose up to 15 minutes on authorizations. With Biosensei, you generate a quick invitation and allow your visitor to arrive directly at the meeting, feeling welcome from the very first second.

Mobile Guest 1Mobile Guest 2

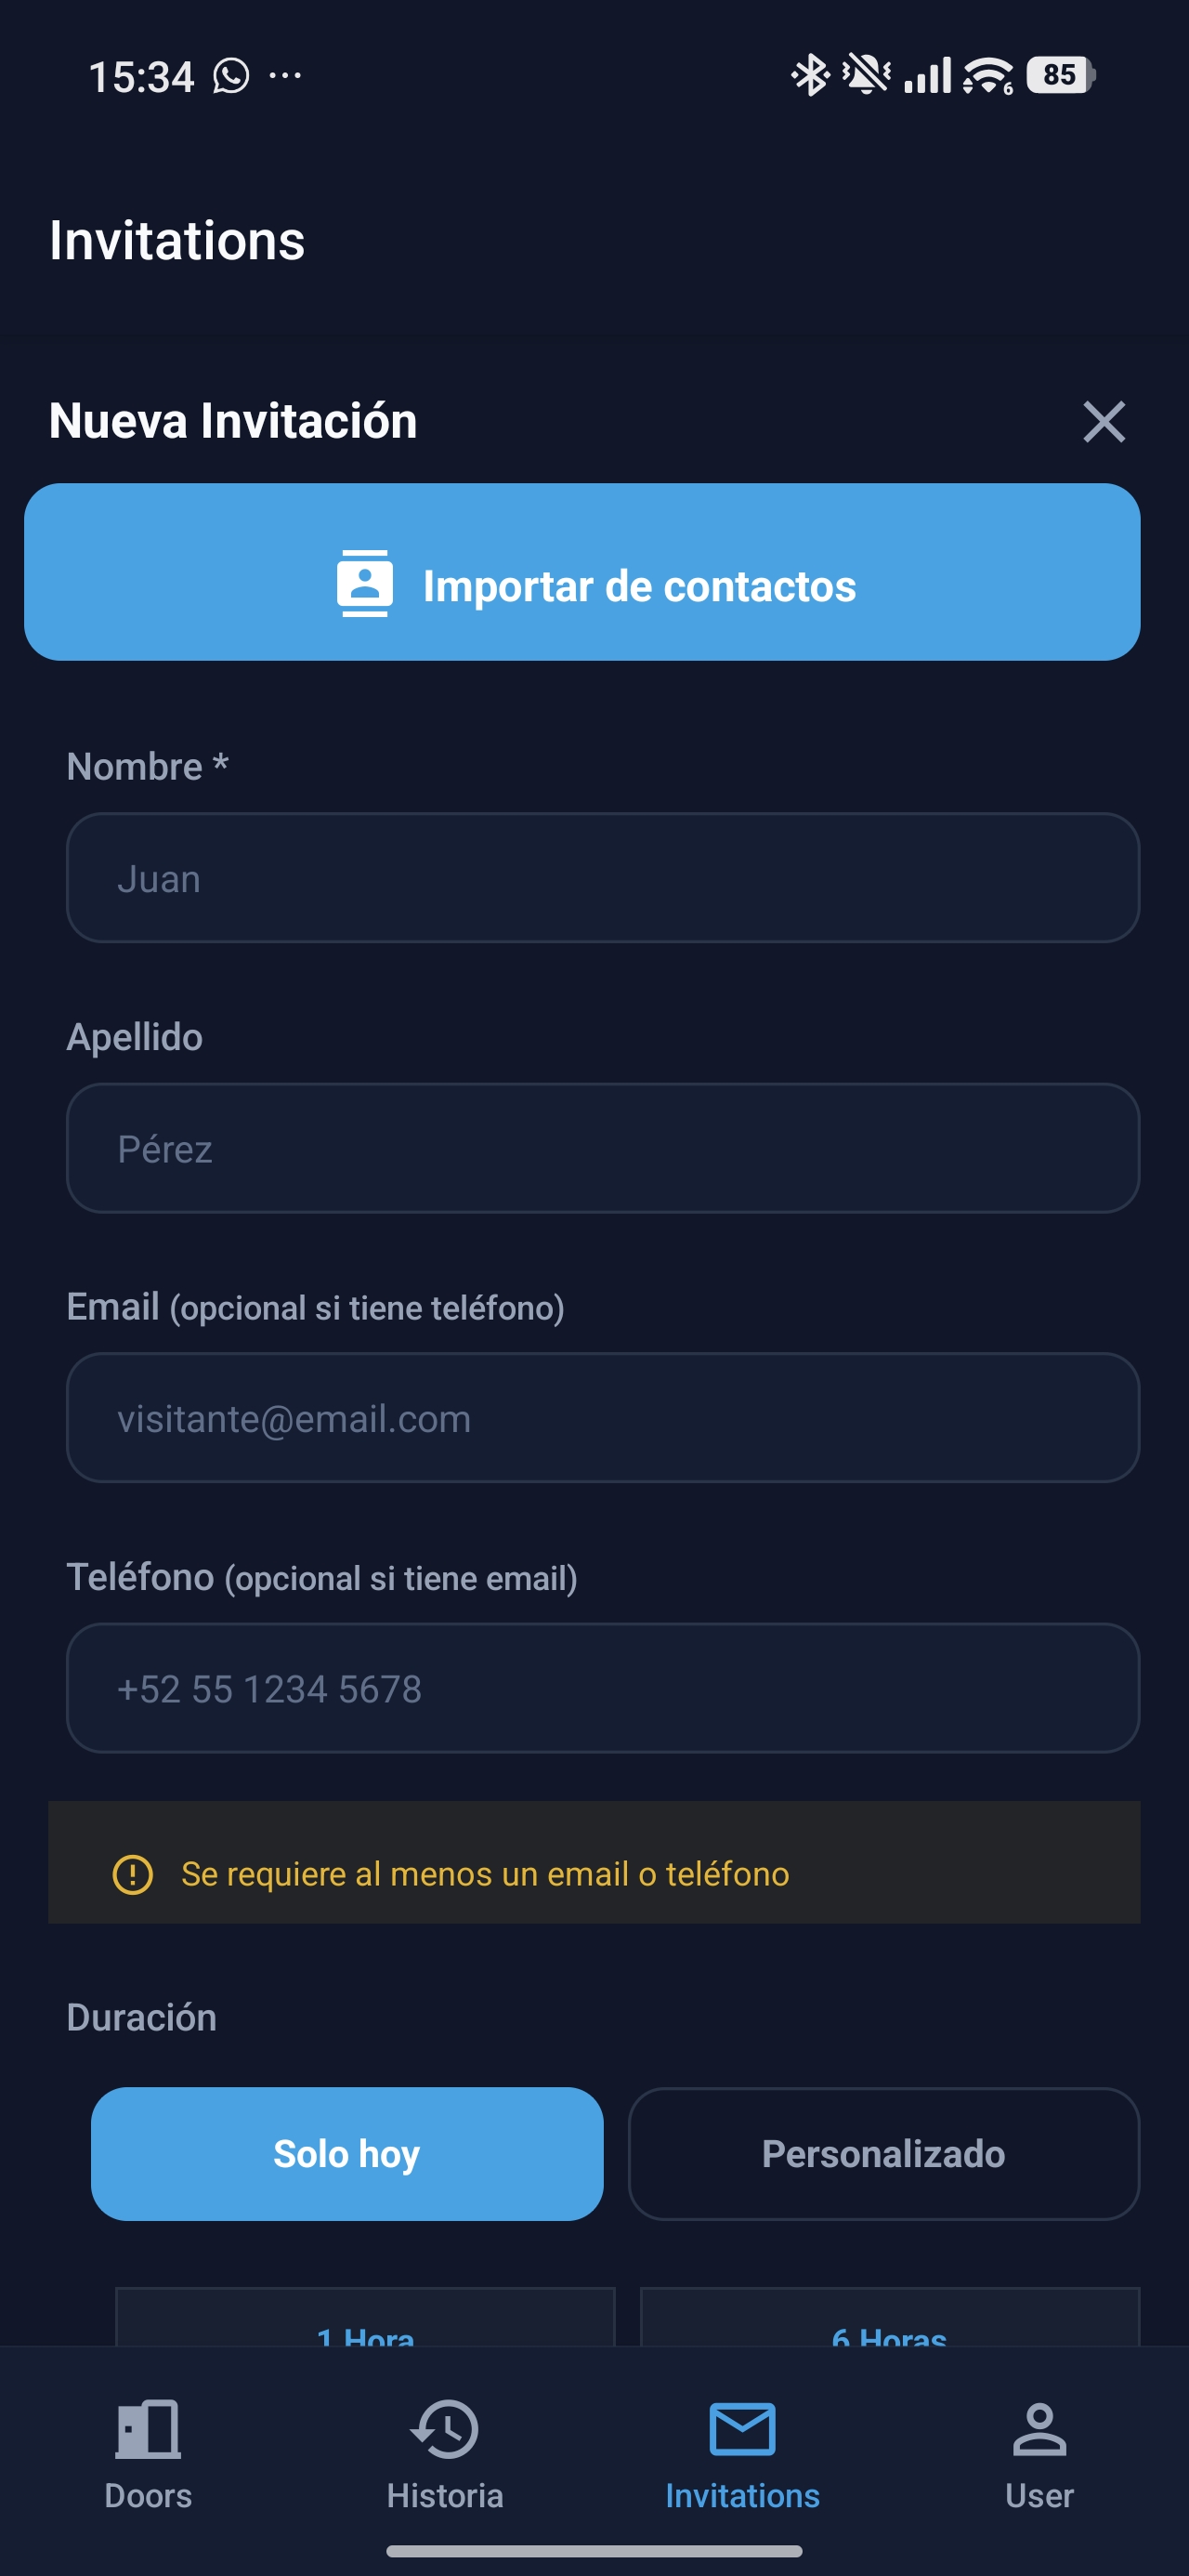
Import contacts directly and authorize accesses in seconds.


⏱️ Surgical Precision Security​

Giving access to a third party doesn't mean giving them total freedom. As you can see in our invitations interface, Biosensei allows you to be extremely precise:

  • Flexible duration: You can choose the invitation to last only 1 hour, 6 hours, or 24 hours.
  • Custom schedules: Define exactly from which minute to which minute the guest can operate the door.
  • Automatic expiration: Once the time is up, the access is automatically revoked.

How does the guest receive it? Your visitor receives a link via WhatsApp. Upon opening it, they will see the doors you gave them permission to use and will be able to enter autonomously, making their experience as a client impeccable.


πŸ“Š Everything Under the Radar: Logs and Multi-Workspace​

The application does more than just open doors; it is a complete management tool:

  • Real-time history: Review the details of each access to know who entered and through where.
  • Multi-Workspace: If you manage more than one office or building, you can switch organizations with a couple of taps without having to log out.

Workspaces

Jump between different offices or clients instantly.


Are you ready to stop using your ZKTeco as a simple reader and start using it as a smart experience platform?​

Register in Biosensei Now

Step-by-Step Guide: How to Connect Your ZKTeco Device to Biosensei

Β· 3 min read
BioSensei Team
Engineering & Product

In this tutorial, you will learn how to link your ZKTeco time clock or access control device to the Biosensei platform in just a few minutes. Follow these steps to activate cloud synchronization and start managing your attendance in real-time.

Prerequisites​

  • Have an active account at app.biosensei.io.
  • A ZKTeco device compatible with ADMS/Cloud.
  • Stable internet connection (Ethernet or Wi-Fi) at the installation site.

Step 1: Start the process on the platform​

First, log in to your Biosensei account. Once inside the main dashboard, go to the Devices section in the side menu.

Click on the blue "Connect Device" button located in the top right corner of the screen.

Step 1


Step 2: Internet Connection​

You will now see the connection wizard. Make sure your ZKTeco equipment is powered on and has internet access.

  • Cable: Connect the Ethernet cable directly to the router.
  • Wi-Fi: Configure the wireless network from the device menu.

Tip: If you are on a standard home or office network, make sure to enable DHCP in the device network settings. This will allow it to obtain an IP address automatically and avoid connection issues.

Step 2


Step 3: Configure Cloud Server (ADMS)​

This is the crucial step. You must point your device to the Biosensei servers.

On the ZKTeco clock menu, navigate to Network > Cloud Server Settings and adjust the following:

  1. HTTPS: Enable it. This ensures information travels encrypted. Note: The device will restart when enabling this option.
  2. Server Address: Change the mode to "Domain Name".
  3. Server URL: Type the unique web address shown on the Biosensei screen in this step.

Important! The address has the format [your_code].biosensei.io. In the example image you will see new.biosensei.io, but you must type the one that appears on your own screen, as this address is unique to your workspace.

Step 3


Step 4: Waiting for connection​

Once the physical device is configured, click the "Next" button on the web platform.

Biosensei will start "listening" to the network waiting for your device to report. This may take a few seconds while the device establishes contact with the cloud.

Step 4


Step 5: Select your device​

When the connection is established, Biosensei will detect the equipment and show it to you in a list.

Verify that the Serial Number (S/N) on the screen matches the label on the back of your ZKTeco machine. If correct, click the "Select" button.

Step 5


Step 6: Assign location​

To keep your inventory organized, the system will ask you to assign this device to a Company and the corresponding Area (for example: Reception, Warehouse, Head Office).

Select the options and click "Assign".

Step 6


Ready! Device Connected​

Congratulations! Your device has been successfully registered and now appears "Online".

Step 7

From now on, attendance records will automatically travel to the cloud.

Next steps:

  • Access Control: If your equipment opens doors, you can proceed to configure Access Groups.
  • User Management: You can now start sending users and fingerprints from the platform to the device. [Coming soon: User synchronization guide]